How Can We Help?
Search for answers or browse our knowledge base.
SYNCNOW
![]() SyncNow – connect teams , tools and processes
SyncNow – connect teams , tools and processes
NetSuite Connector
Setting NetSuite Token Authentication
Create an Integration Record
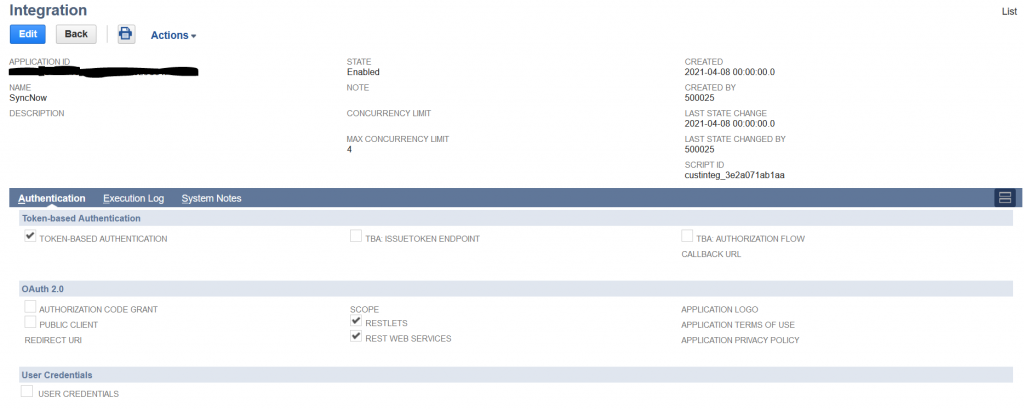
The Integration Record identifies the application in NetSuite’s system. Follow these steps to create the required Integration Record.
- Navigate Setup->Integration->Manage Integrations->New page
- Create an Integration Record if none exists.
- After creating the record, retain the displayed API Key and API Secret.
- Retain the Application ID
- If the Integration Record already exists, but it doesn’t have a API Key and API Secret: edit the Integration Record, then click Reset Credentials, and set them to:
- Name: Your-Application-Name
- Authentication: Token-Based Authentication
- State: Enabled
SyncNow connector uses NetSuite Token authentication , here is how to configure NetSuite to work with SyncNow.
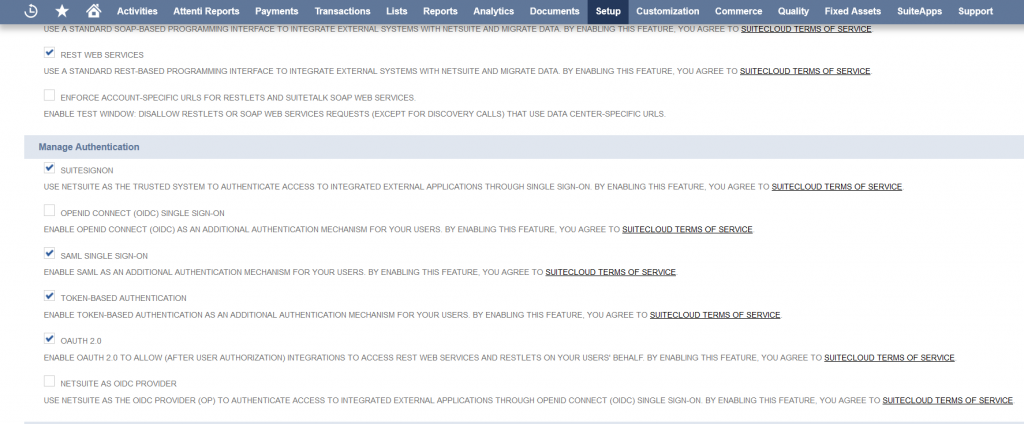
Enable Token Authentication
- Navigate to Setup > Company > Setup Tasks > Enable Features > SuiteCloud > Manage Authentication
- Make sure Token Based Authentication is enabled.
- Click Save
Set an Integration Custom Role
- Navigate to Setup > Users/Roles > Manage Roles > New
- Create a new role, enter name name and ID.
- Set the necessary permissions, restrictions, and preferences needed for your SyncNow to work properly.
- For every record type which needs to be synchronized as target make sure to include edit permission.
- For every record type which needs to be synchronized as target make sure to include read permission.
- If there any custom record types, add permissions for every custom record type in the custom record tab.
- As an extra security measure, only include the minimum number of permissions necessary for the integration to function.
- For Token-based Authentication, the Role’s permission set must also include the following under the Setup subtab:
- Access Token Management
- User Access Tokens
- SOAP Web Services
- REST Web Services
- Log in using Access Tokens
Create Access Tokens
- Navigate to Setup->Users/Roles->Access Tokens->New
- Select the application and role you created earlier, then click Save.
- Retain the Token ID and Token secret.
Account ID
- In NetSuite Admin, click Setup > Integration > Web Service Preferences.
- Retain the Account ID displayed under the Account ID heading.
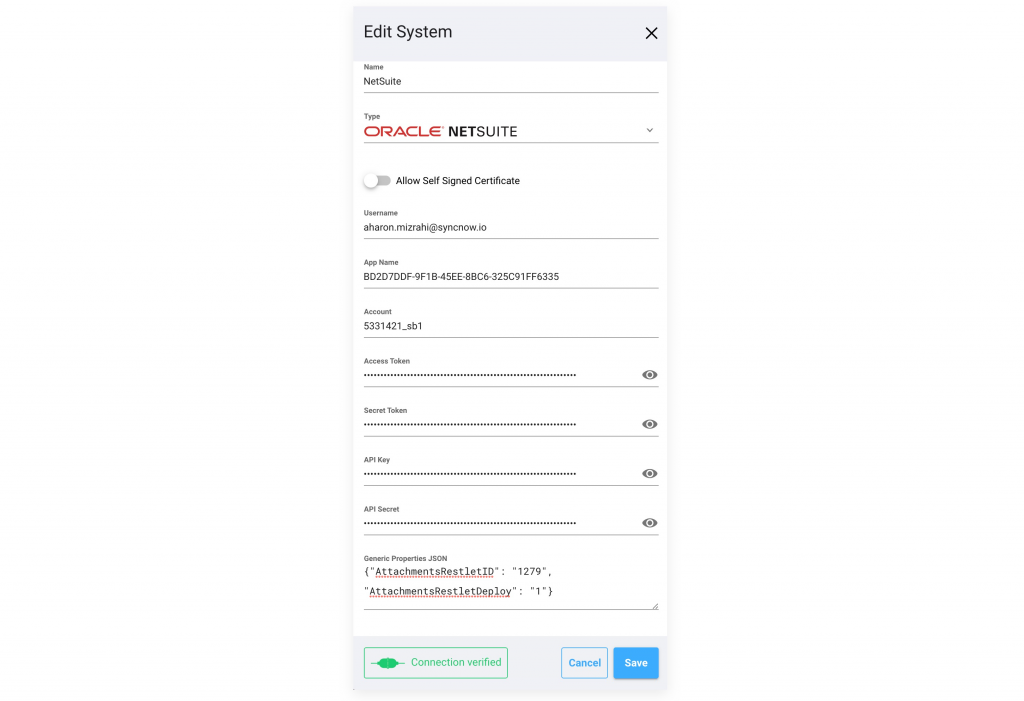
Set : API Key, API Secret, Application ID, Token ID, Token secret and to SyncNow System connector dialog

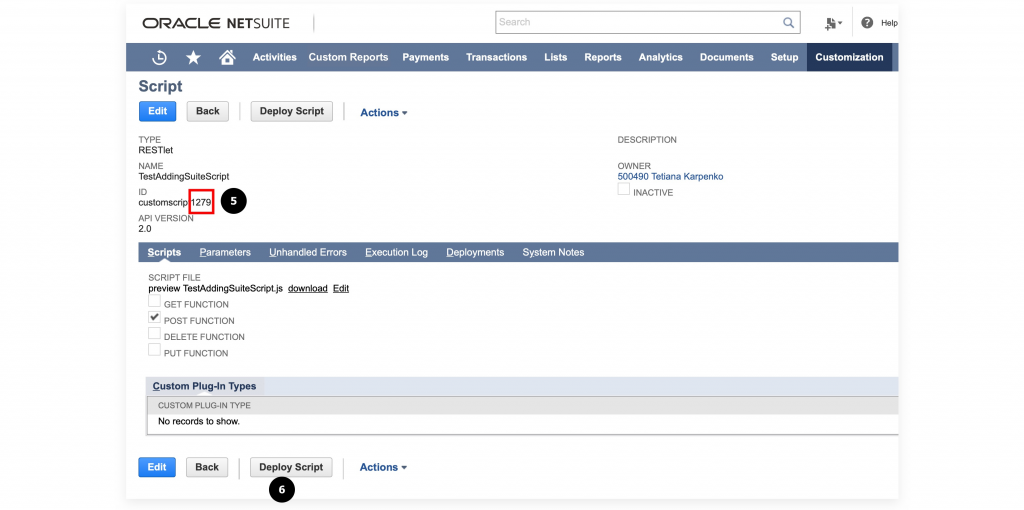
Create RESTlet script for synchronizing attachments
Use this the following procedure to add support for attachments synchornization
- Navigate to the Customization > Scripting > Scripts > New
- Press the
+button

- Upload AttachmentRestlet.js file – it can be found in the installation directory under Install->scripts->NetSuite

- Press the Create Script Record button

- Retain the Attachments Suite Script ID
- Press the Deploy Script button
Set : API Key, API Secret, Application ID, Token ID, Token secret and Attachments Suite Script ID add to SyncNow System connector dialog