Search for answers or browse our knowledge base.
SYNCNOW
![]() SyncNow – connect teams , tools and processes
SyncNow – connect teams , tools and processes
SyncNow Configuration Settings
Below are SyncNow Settings which are done for all the app instances from the user interface. To configure SyncNow navigate to Service Settings page.
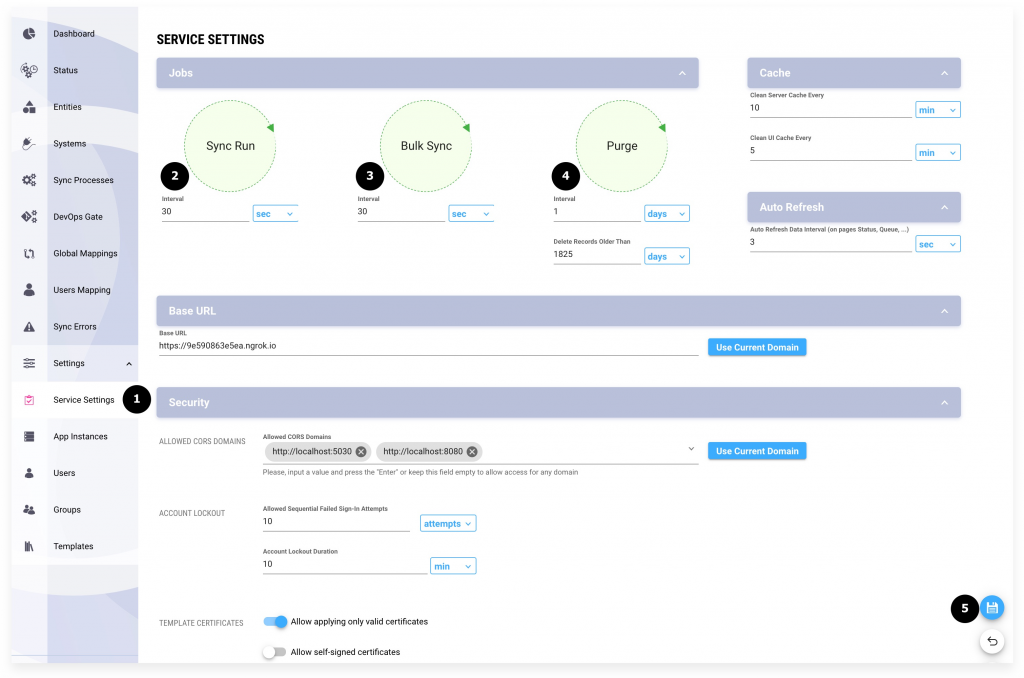
Cycling Jobs Settings
- In the jobs section as presented below presented cyclic SyncNow jobs, their time and if they are activated.
- Enable/Disable Sync Run Job. Set time interval between two sequential sync runs
- Enable/Disable Bulk Sync Job. Set a time interval between two sequential bulk synchronizations
- Enable/Disable Purge Sync Job.
- Set a time interval between two sequential purge processes. All info about sync runs where no entities were found will be deleted
- Set a time interval for saving a synchronization history (the default is 5 years)
- Press the Save button.
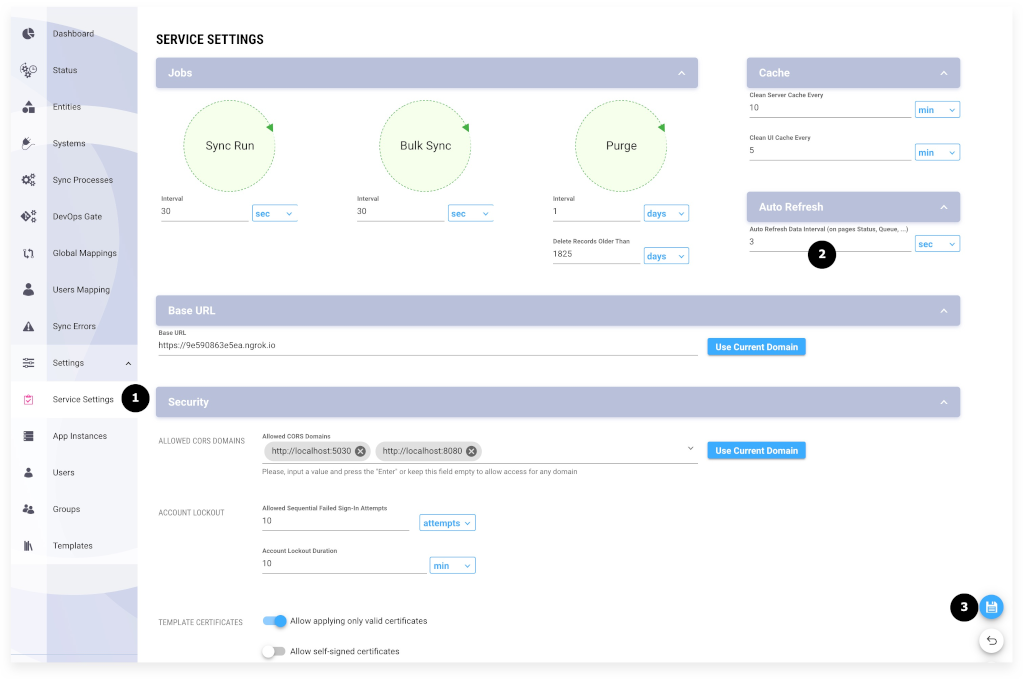
Auto-Refresh Settings
This settings for the auto refresh of status and queue pages
- Navigate to Service Settings page
- Set a preferable time interval for auto-refresh of data on the following pages: Status, Queue, Sync Errors, App Instances
- Press the Save button.
System Cache Settings
SyncNow stores cache for systems metadata, this is caching refresh interval for every item which is cached.
- Navigate to Service Settings page
- Set a preferable time for cache life for the UI and server data
- Press the Save button

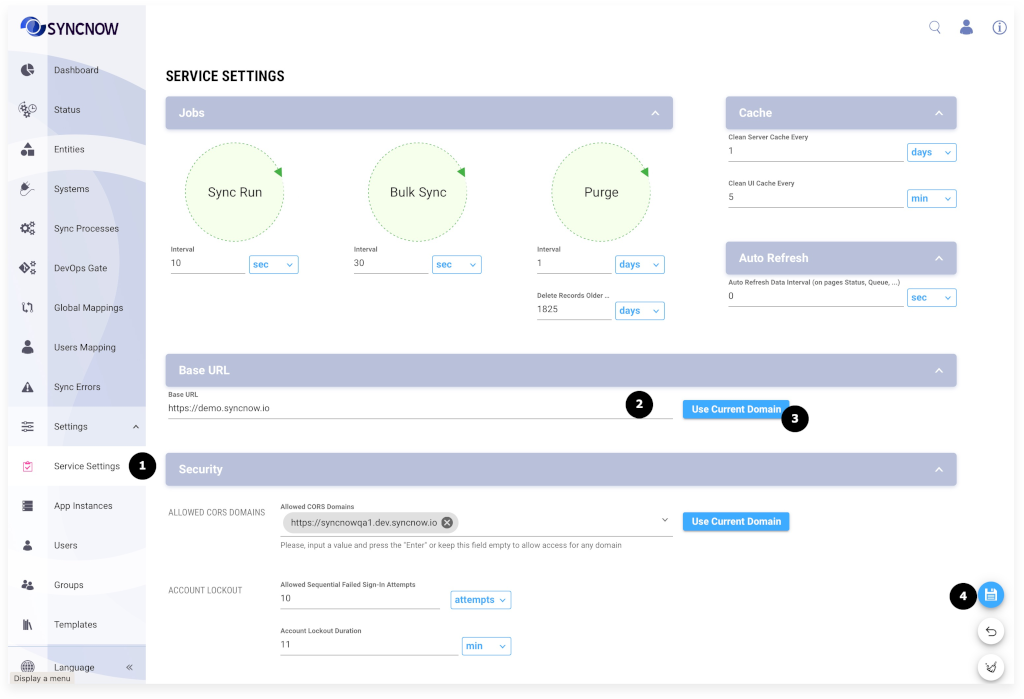
System Base URL
The base URL is required to subscribe with WebHooks for Sync and DevOps Gate Processes – this is the base URL for webHook that should call SyncNow.
- Navigate to Service Settings page
- Type a URL or
- Press the Use Current Domain button to set the current URL
- Press the Save button
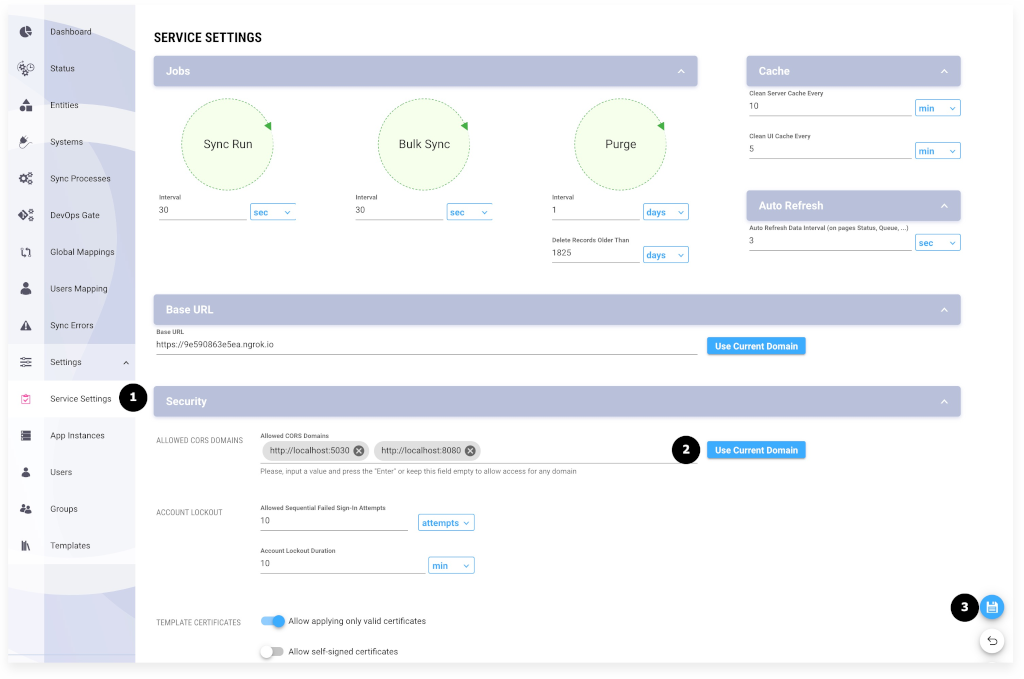
Security Settings
Allowed CORS Domains
To restrict or open the access to APIs from the world the Allowed CORS Domain option is provided.
- Navigate to the Service Settings page
- Add domains to which you want allow access, or keep this field empty if you want to open the access to API to anyone
- Press the Save button
Account Lockout Settings
Set here the number of failed logins till an account will be locked out and the duration of the locking.
Template Certificates
- Check if to allow only template signed with valid certificates
- Check if to allow templates signed with self signed certificates
It is recommended to use only valid certificates, self-signed certificates should not be used in production environments